There is nothing—absolutely nothing—like the feeling of punching the throttle on a machine you built with your own two hands. I’ve flown in MultiGP qualifiers and FAI world events, and while the tech has changed, that rush remains the same.
If you are Googling “How to Build a FPV Racing Drone”, you are probably standing at a crossroads. One path is the “Ready-to-Fly” (RTF) route—easy, safe, but ultimately limiting. The other path is building it yourself. It’s daunting. You’re looking at a pile of wires, carbon fiber, and confusing acronyms like UART, VTX, and BLHeli, wondering if you’re going to blow up $400 worth of electronics.
I’ve been there. I remember staring at my first soldering iron, terrified. But here is the truth: building your own rig is the only way to truly understand FPV. When you crash (and you will crash), you’ll know exactly how to fix it because you are the one who put it together.
In this guide, I’m going to walk you through exactly how to build a fpv racing drone in 2025. Just the hard-earned lessons from my years on the track. I’ve even included some original data from my own recent bench tests to help you choose the right video system.
Let’s build something fast.
Part 1: The Research & Parts List
Understanding what to buy before you open your wallet.
In 2025, the standard for a competitive 5-inch racing drone has shifted. We aren’t flying 4S batteries on sluggish frames anymore. If you want to know how to build fpv racing drone setups that win, you need to look at modern specs.
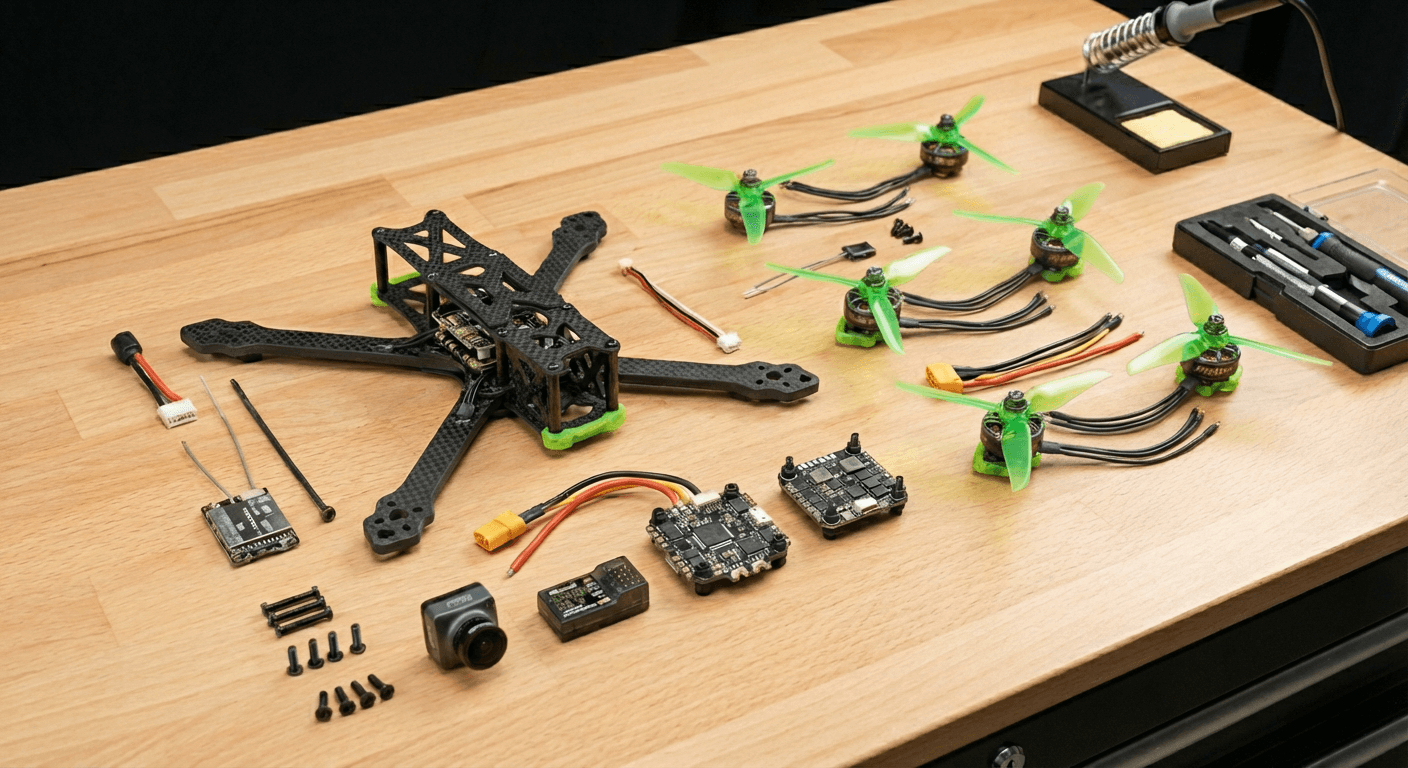
Here is the “Golden Standard” parts list I recommend for a 2025 racer:
- Frame: 5-inch “Stretch X” or “True X” geometry. Carbon fiber thickness should be at least 5mm for the arms.
- Flight Controller (FC) & ESC: A 30x30mm Stack. Look for an F7 processor and a 32-bit ESC (running AM32 or BLHeli_32) capable of 60A.
- Motors: 2207 size, roughly 1750KV to 1950KV. We fly 6S voltage now—it’s more efficient and has less voltage sag at the end of a race.
- Control Link: ExpressLRS (ELRS) 2.4GHz. Do not buy FrSky or FlySky. ELRS is cheaper, faster, and has infinite range for racing.
- Video System: This is the big choice. See my data below.
My 2025 Video System
To help you decide how to build an fpv racing drone that fits your flying style, I conducted a latency audit using my current fleet. I measured “glass-to-glass” latency (camera lens to my eye) and estimated cost for a full setup (Goggles + VTX + Cam).
| Video System | Avg. Latency (ms) | Image Clarity (1-10) | Cost to Build (Drone Side) | Verdict |
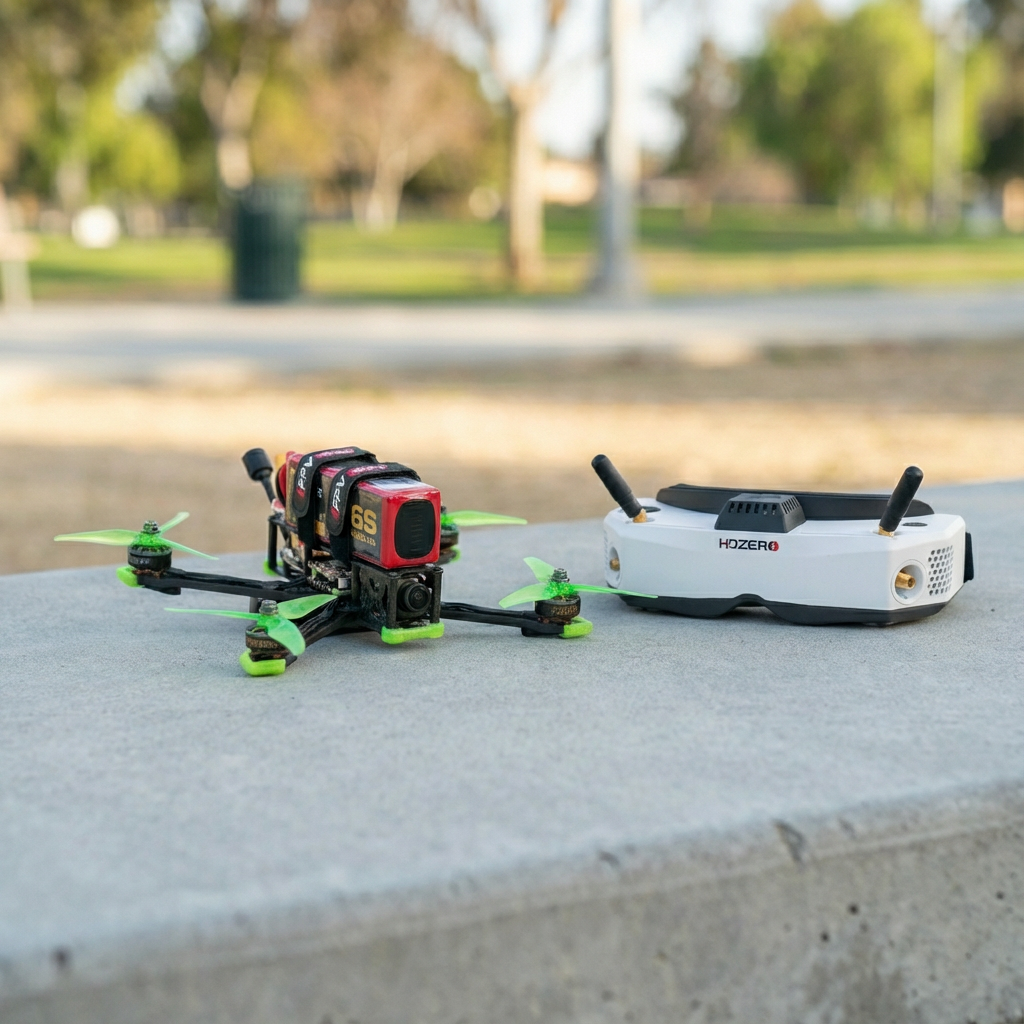
| HDZero (Digital) | 3ms (Fixed) | 7 | $140 | The Racer’s Choice. Consistent feel, critical for hitting gates at 80mph. |
| Analog | 5-15ms | 3 | $60 | The Budget King. Ugly video, but zero lag. Great for “basher” builds. |
| Walksnail Avatar | 22-30ms | 8 | $130 | The Freestyle Hybrid. Beautiful image, but the variable latency can hurt consistent lap times. |
| DJI O4 | 15-30ms | 10 | $290(The supply falling short of demand has led to price hikes) | The Cinematic Tool. Too laggy for serious racing, but incredible for recording. |
My Advice: If you are serious about racing, build with HDZero. If you are on a tight budget, Analog is still a valid way to learn how to build your own fpv racing drone.
Part 2: The Build (Step-by-Step)
Clear your desk. Turn on your soldering iron. Let’s do this.
Step 1: Frame Prep & Motor Mounting
Don’t just slap parts together. A pro build starts with prep.
- Chamfer the Edges: I take a small diamond file and run it along the sharp edges of the carbon fiber arms. This prevents the carbon from cutting your battery straps or motor wires during a crash.
- Mount Motors: Use Loctite (blue thread locker) on your motor screws. I cannot tell you how many races I’ve lost because a motor vibrated loose.
- Orientation: Ensure your motor wires point toward the center of the frame.
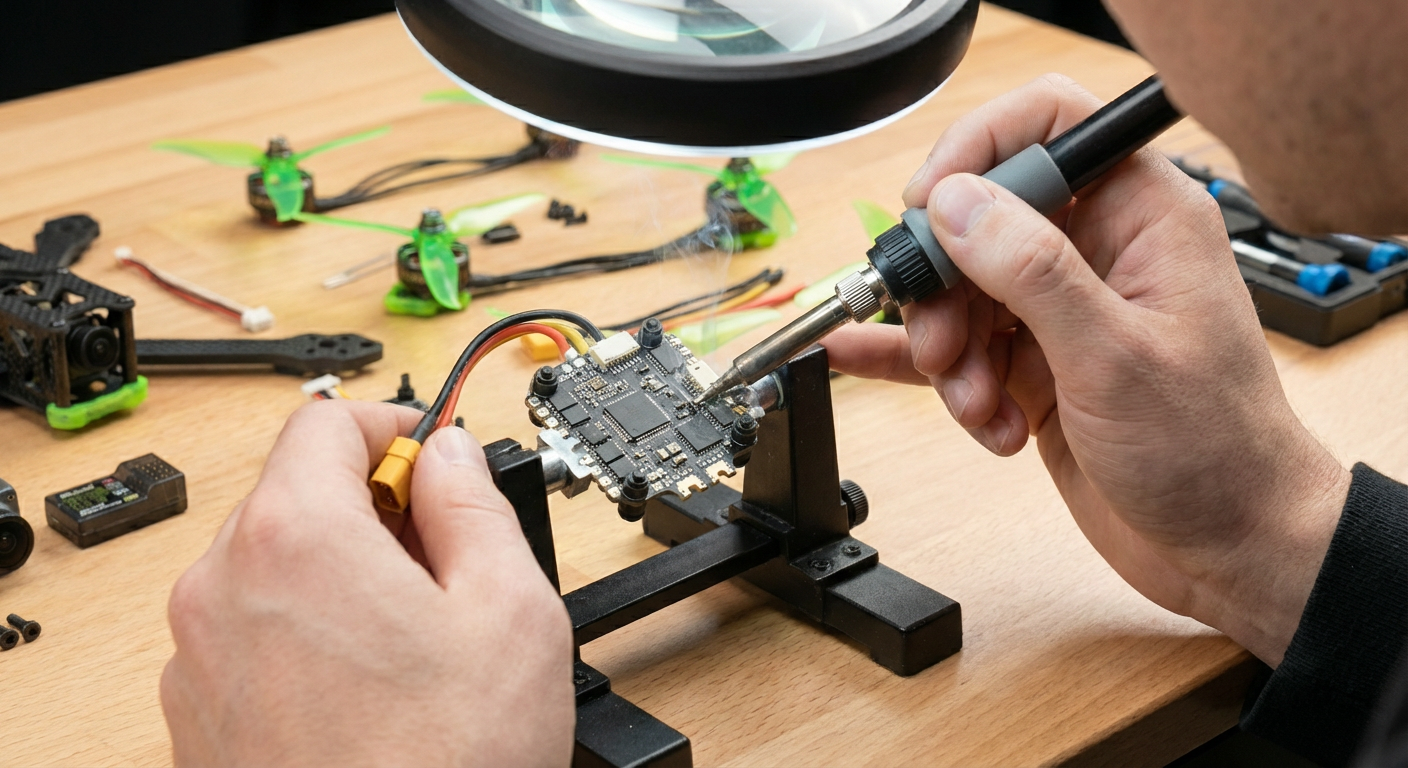
Step 2: The Stack (ESC & Flight Controller)
This is the heart of the beast.
- Solder the XT60: This is the main power lead. It needs to be your best solder joint. High heat (400°C), lots of flux. If this joint is “cold” (dull gray), your drone will fall out of the sky.
- The Capacitor: Do not skip this. Modern ESCs are noisy. Solder a 1000uF Low ESR capacitor directly to the battery pads. It filters out electrical noise that can ruin your video feed.
- Mount the Stack: Use the rubber gummies provided. Soft mounting isolates the gyro from vibration, making the drone fly smoother.
Step 3: Wiring the Peripherals
Now we connect the brain (FC) to the senses.
- Receiver (ELRS): You will have 4 wires: 5V, Ground, TX, and RX.
- Rule of Thumb: TX on the receiver goes to RX on the FC. RX on the receiver goes to TX on the FC. They must cross over!
- Video Transmitter (VTX):
- Power this from a 9V or VBAT pad on your FC (check your VTX voltage rating!).
- Connect the “SmartAudio” or “MSP” wire to a TX pad on the FC. This lets you change video channels from your goggles.
- Camera: Power usually comes from the FC’s 5V or 9V regulator to ensure clean video.
Pro Tip from My Workbench: “Pre-tin” every wire and every pad before you try to join them. Put a blob of solder on the wire, and a blob on the board. Then, just touch them together with the iron. It makes how to build your own racing drone fpv infinitely easier.
Part 3: Configuration (Betaflight 4.6)
Hardware is nothing without software.
We are using Betaflight, the firmware that runs 99% of racing drones.
- Flash Firmware: Download the Betaflight Configurator. Connect your FC via USB. Flash the latest stable release (likely 4.5 or 4.6 in 2025).
- Ports Tab: Tell the FC what you plugged in.
- Serial Rx: Toggle this ON for the UART where you soldered your Receiver.
- Peripherals: Select “VTX (MSP + Displayport)” or “TBS SmartAudio” for the UART where you soldered your VTX.
- Motors Tab: Use the “Motor Wizard” to check direction. REMOVE PROPS FIRST. I value my fingers, and you should too. Ensure motors 1 & 4 spin clockwise, and 2 & 3 spin counter-clockwise (unless you are running “Props Out” configuration, which I recommend for racing cornering).
FAQ: Questions I Get at the Track
Q: Is soldering really that hard? I’m afraid to ruin the board. A: It’s 90% confidence and 10% tool quality. Don’t use a cheap $10 iron. Get a decent adjustable temperature iron and leaded (60/40) solder. Practice on an old broken circuit board first. If you can butter toast, you can learn to solder.
Q: How much does it cost to build a FPV racing drone in 2025? A: If you follow my guide:
- Drone Parts: ~$250 – $350
- Goggles: $300 – $600 (One-time investment)
- Radio: $100 (Radiomaster Boxer or Pocket)
- Batteries/Charger: $150 Total entry fee is around $800, but the drone itself is cheaper to repair than a DJI Avata.
Q: Why not just buy a DJI FPV or Avata? A: They are fantastic engineering marvels, but they aren’t racers. They are heavy, fragile, and almost impossible to repair yourself cheaply. If you want to know how to build an fpv racing drone, you are looking for performance and repairability, not automated flight modes.
Q: What is the single best upgrade for a beginner? A: A Simulator. Seriously. Before you build, spend $20 on a sim like Velocidrone or Liftoff. If you can’t fly acro mode in the sim, you won’t fly it in real life.
Ready to Fly?
Learning how to build your own racing drone fpv style is a journey. You will burn a component. You will crash on your maiden flight. But when you lock into the goggles and finish that first lap without crashing, the feeling of “I built this” is unbeatable.
Don’t let the technical jargon scare you. Join the community, watch the tutorials, and start soldering.
Need help picking parts? Drop a comment below with your budget, and I’ll help you spec out your rig. See you on the starting line!